
How to Use a SATA Power Splitter for Dual SSDs: Step‑by‑Step PC Upgrade Guide
Category: PC Building & Storage | Reading Time: ~6 minutes | Level: Beginner to Intermediate
Understanding SATA Power Limitations
Opening your PC case to add more storage often reveals a frustrating surprise — your power supply doesn’t have enough SATA power connectors. Modern SSDs are affordable and fast, making dual‑drive setups ideal for gaming, video editing, or expanding system capacity. But many pre‑built desktops and budget PSUs include only two or three SATA power leads, leaving unused drive bays powerless.
Instead of buying a new PSU or re‑routing cables, you can use a SATA power splitter — a simple, inexpensive adapter that safely divides one power line into two. This guide walks you through how it works, why it’s safe for SSDs, and exactly how to install it step‑by‑step.
Why Use a SATA Power Splitter?
Power Supply Connectivity Limits: Entry‑level PSUs often lack enough SATA connectors for multiple drives.
Cost‑Effective Expansion: A quality splitter saves you from buying a new modular PSU.
Maximize Storage Bays: Use all available 2.5‑inch slots without cable shortages.
Clean Cable Management: Fewer cables mean a tidier, more professional‑looking build.
Top Benefits of Running Dual SSDs
- ISOLATED OPERATING SYSTEM PATHS: Dedicating one isolated drive exclusively to your Windows operating system preserves essential boot speeds while freeing up room elsewhere.
- MASSIVE GAME STORAGE FREEDOM: Moving massive modern AAA gaming installations to an independent secondary drive prevents your primary boot drive from filling up completely.
- ZERO PERFORMANCE SPEED LOSS: Running two drives off a single power splitter does not bottleneck or degrade the digital data transfer rates of your storage hardware.
- IMPROVED FILE EDITING WORKFLOWS: Content creators can safely read raw footage from one drive while simultaneously rendering finalized video exports directly onto the second drive.
Step‑by‑Step SATA Splitter Installation Guide
Total Component Power Down Turn off your PC completely. Turn off your PSU and unplug the wall cable before opening your case.
Secure Physical Drive Mounting Bolt both SSDs into their 2.5‑inch trays using fine‑threaded screws.
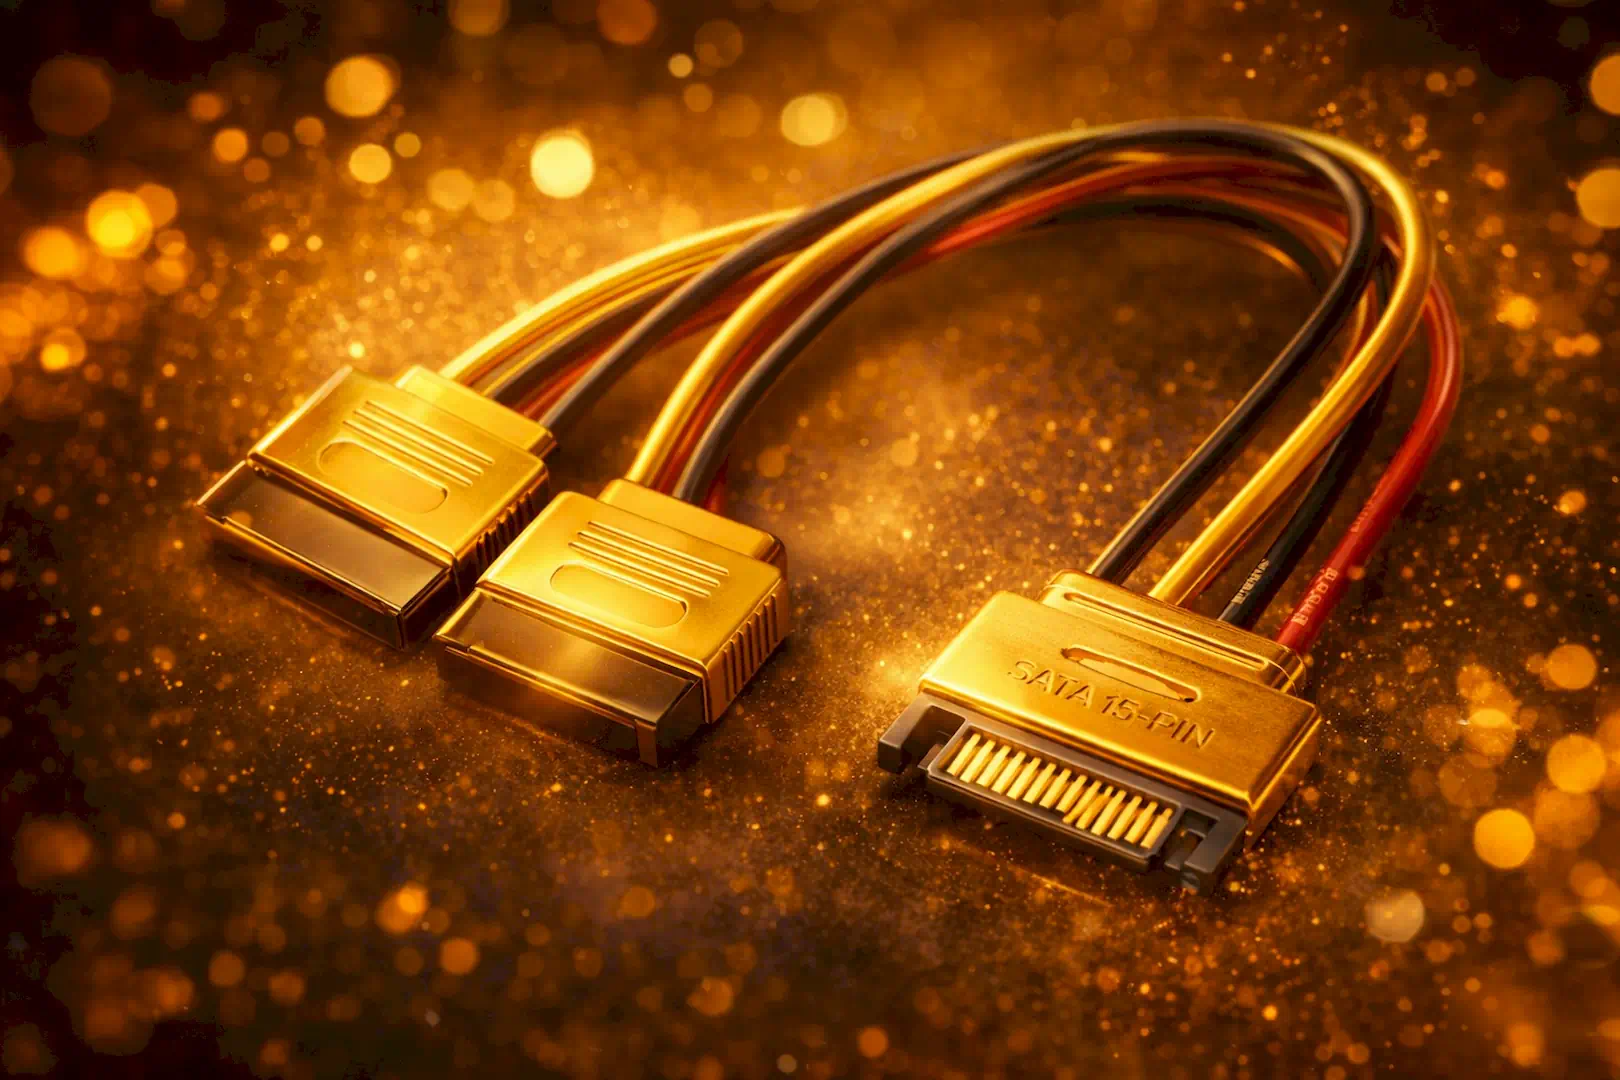
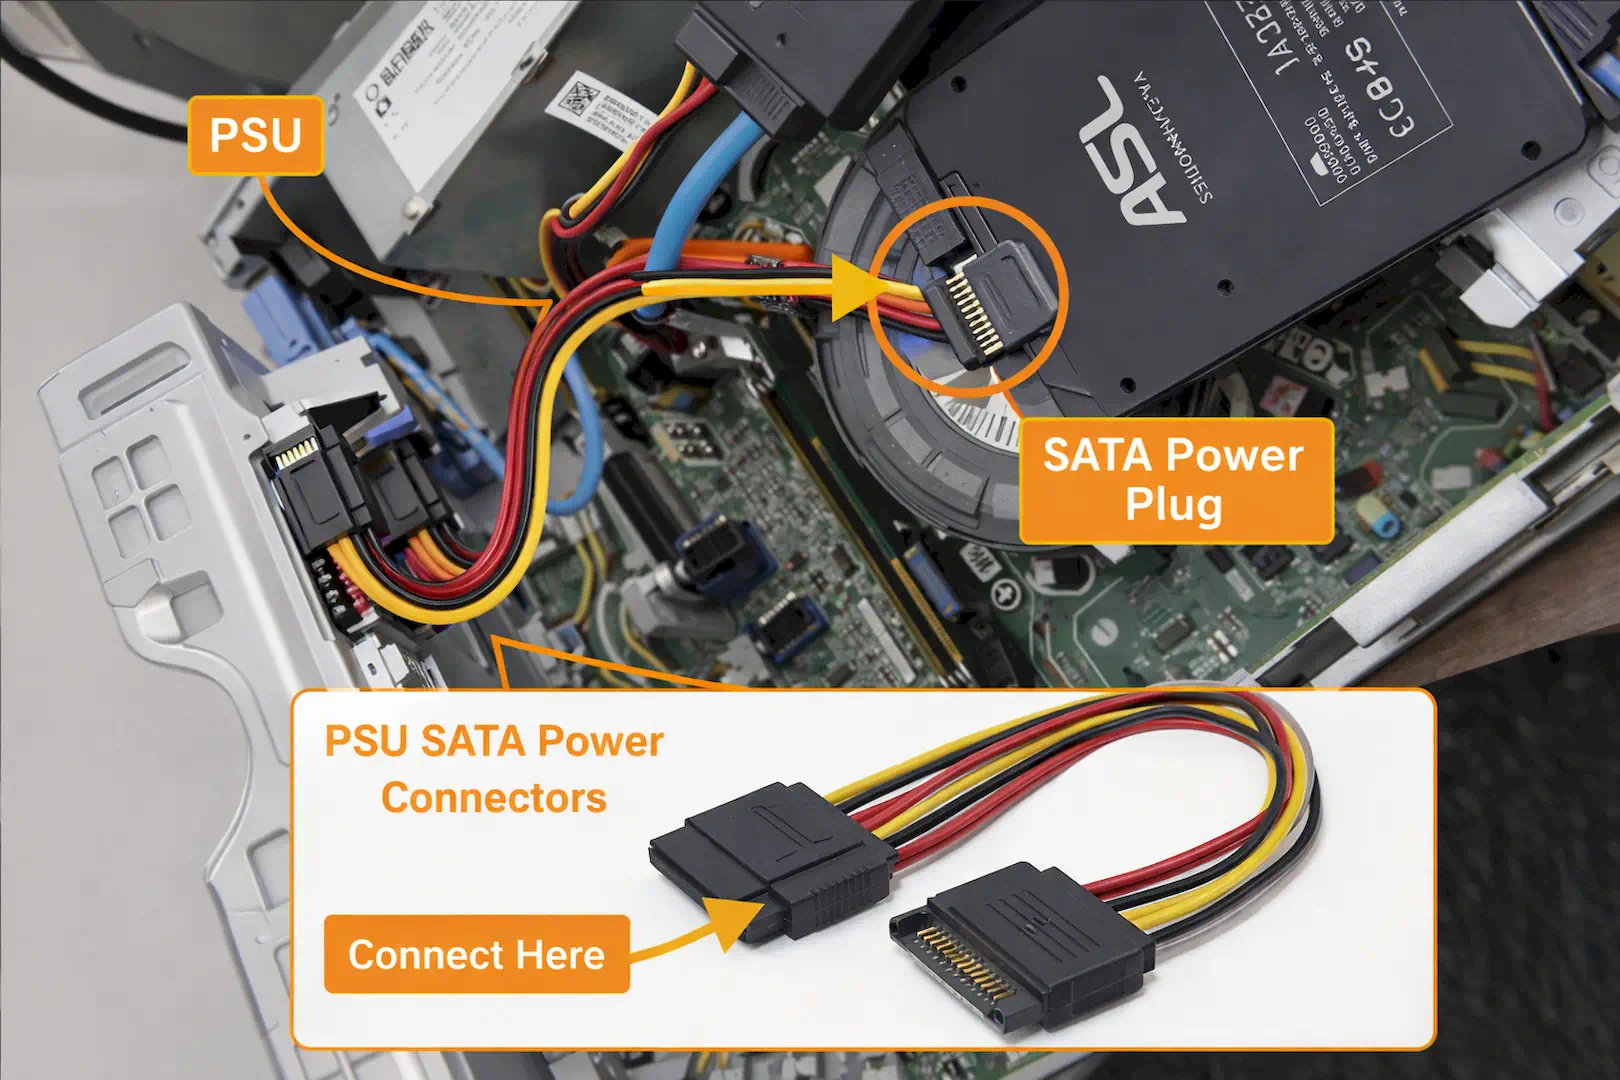
Plug in the Main Input Connect the male end of your SATA power splitter to the female SATA power cable from your PSU spot from PC board.
Divide the Power Leads Attach the two female splitter outputs to each SSD’s 15‑pin power port.
Attach Separate Data Cables Connect two independent SATA data cables from each SSD to your motherboard’s SATA0 and SATA1 ports.
Boot and Initialize Storage Power on your PC, open Windows Disk Management, and format the new drives to make them usable. Please strictly follow this guide.
THE CRITICAL CONDITIONS: SAFETY RULES TO PREVENT FAILURE
- AVOID MOLDED PLASTIC ADAPTERS: Always purchase splitters with crimped, modular plastic heads rather than injection-molded designs to eliminate underlying electrical fire risks.
- RESPECT SATA POWER LIMITATIONS: Solid-state drives pull very little electrical current, making them completely safe to split, unlike power-hungry mechanical hard drives.
- NEVER STACK MULTIPLE ADAPTERS: Avoid chaining multiple splitters together in a series, as cascading connections will cause severe voltage drops and drive instability.
- VERIFY COOLDOWN CLEARANCE ROOM: Ensure the trailing splitter cables do not pressed tightly against sharp metal chassis edges or interfere with spinning cooling fans.
Thanks for reading this comprehensive guide! Bookmark Sarit Systech for more PC hardware tutorials, SSD installation guides, and power supply optimization tips. Do you have other methods of doing this installation? Share your skills and experience via the comment section.
We continuously track new component releases and publish expert buying guides to help you avoid overpriced hardware and find the best price‑to‑performance parts for your build. Kindly share this post!